Tiltrotators are one of the most advanced and complex attachments in the world for excavators. They allow for endless 360 degree rotation of the attachment as well as up to 50 degrees of tilting angle each side. Tiltrotators are a lot more advanced than most attachments on the market and therefore have many different setup configurations, like mounting options, control systems, quick coupler options & more!
Our aim with this article is to provide you with a complete guide to tiltrotator attachments, not just the NOX tiltrotator that we offer from Kinshofer. The NOX does have some unique features however, most tiltrotator concepts are very similar across all manufacturers.
Contents
- Overview & Applications
- NOX Specifications
- Machine Side Mounting Options
- Lower Coupler Options
- Control Systems & Installations
- Attachments & Tools
- 3D Grading Systems
Overview & Applications
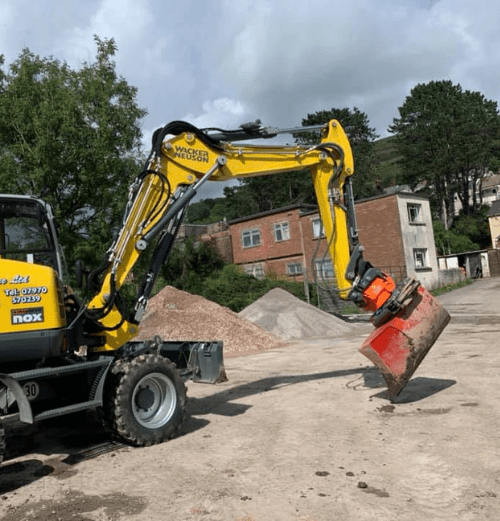
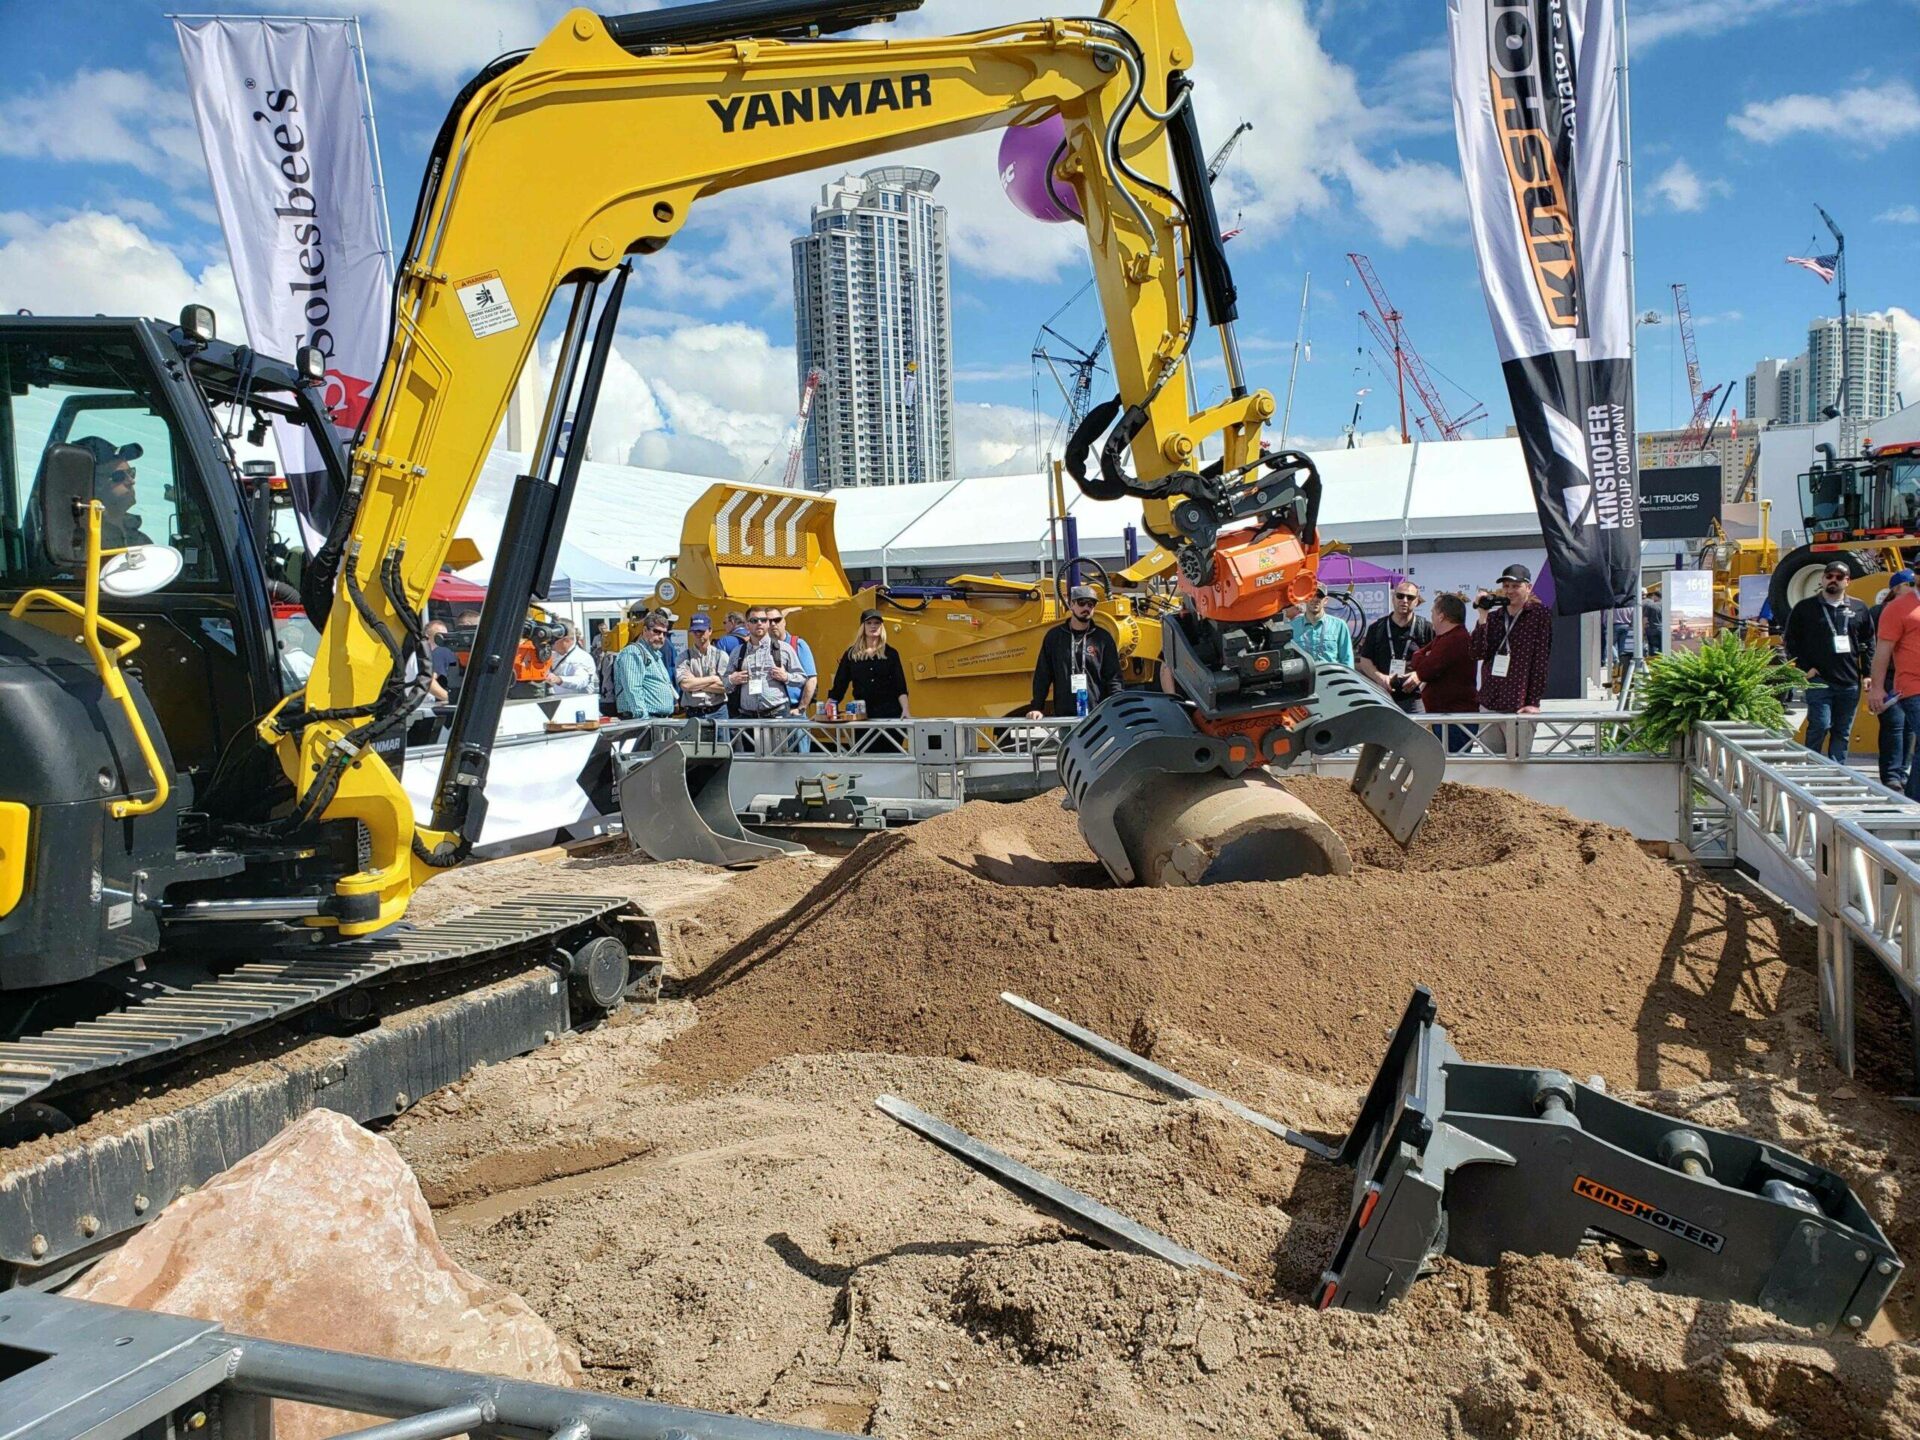
As mentioned earlier tiltrotators offer the greatest flexibility and efficiency for your excavator by allowing a degree of movements that are not possible with a standard setup. Increased range of motions allows you to operate in places that were before inaccessible with your machine or required a lot of repositioning.
However it is not only digging, grading and earth moving that a tiltrotator is useful for. With a range of attachments specifically designed for use with tiltrotators such as compactor plates, grabs, brushes/brooms, grippers and pallet forks, the tiltrotator turns your machine into a multi functional tool carrier.
It is estimated, by most manufacturers, that a tiltrotator can increase the operator’s efficiency by more than 30% and can prove a return on investment in just a few years. This is achievable by completing jobs faster, with less ground workers, burning less diesel and less wear on the excavator. A competent tiltrotator operator requires fewer workers on the ground as they can often complete tasks with the added functionality of the attachments at hand. In short, although they are a large investment, after looking at the numbers they can prove to be a certain smart investment.
NOX Specifications
The next section of this article is going to be more specific to the NOX tiltorator from Kinshofer, however there are still many similarities between the other brands of tiltrotators on the market. For example, the overall range of movements are very similar, the NOX just uses different mechanisms to achieve them. However, the main difference between the NOX tiltrotator and others, is the tilting mechanism so let’s start there.
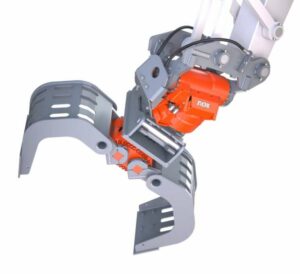
Tilting Mechanism
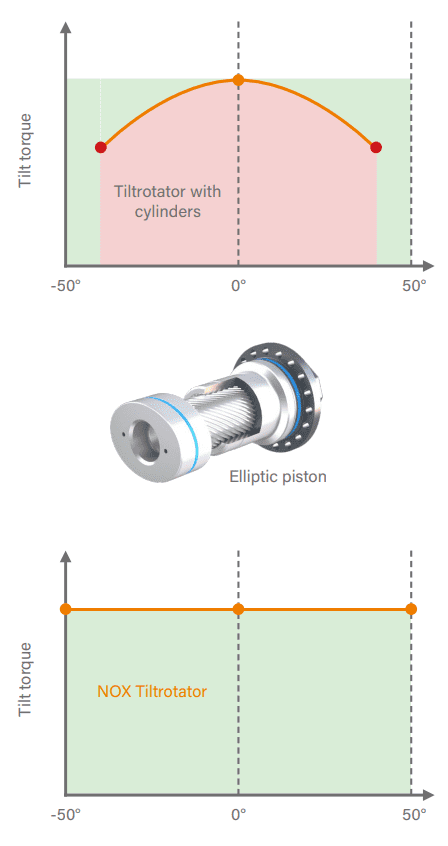
Most tiltrotators on the market use 1 or 2 hydraulic cylinders to achieve the tilting motion. This has its advantages but does add to the overall width of the units. The NOX uses an elliptical piston and sleeve mechanism to achieve a greater range of tilting with 50 degrees each direction. This is the same mechanism that is used in many tilting couplers.
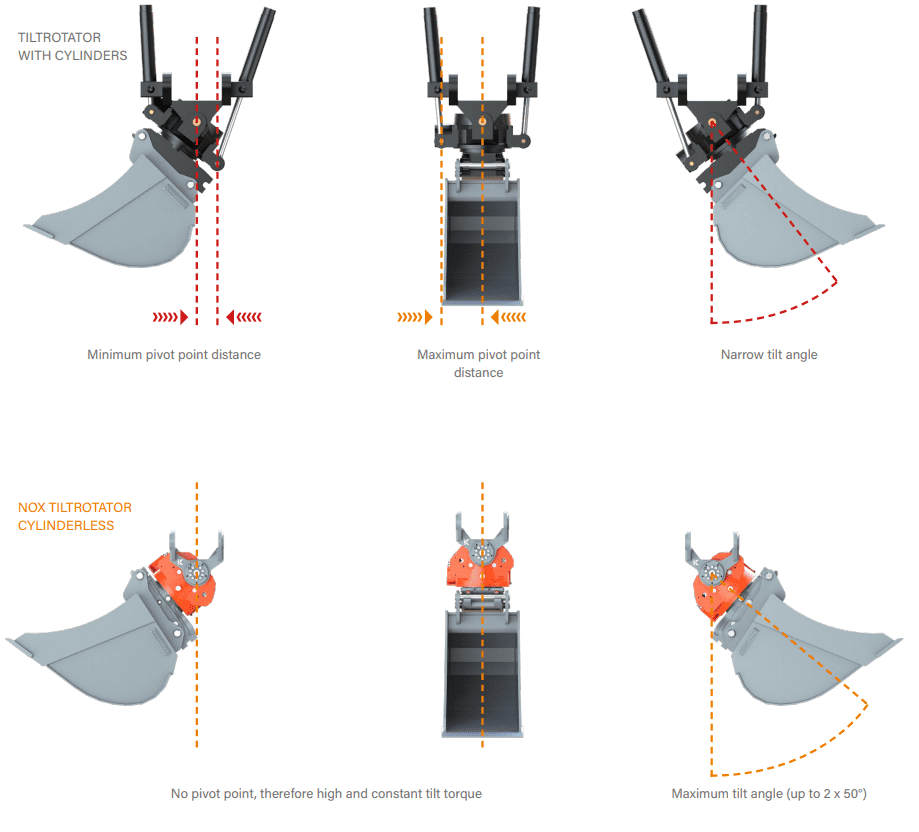
Although this does increase the overall weight and height of the attachment, the idea is to achieve the most tilt possible, as well as keeping the width of the unit to a minimum. This also means that the tilting torque of the unit is constant regardless of the angle. Meaning you will get the same torque in the middle, as you do at 40 degrees on one side.
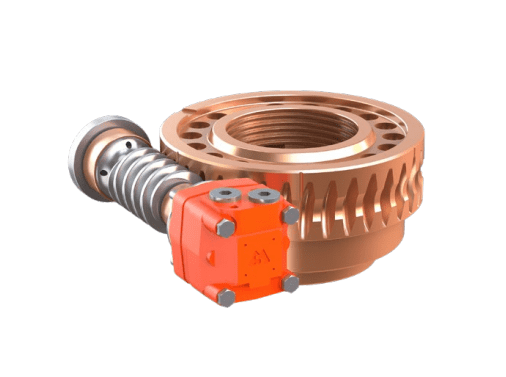
All tiltrotators use a worm drive for endless 360 degrees of rotation. This enables good rotational torque, as well as being able to withstand high loads. In the case of the NOX, the worm drive is specifically designed to keep the overall width of the unit to a minimum.
Machine Side Mounting Options
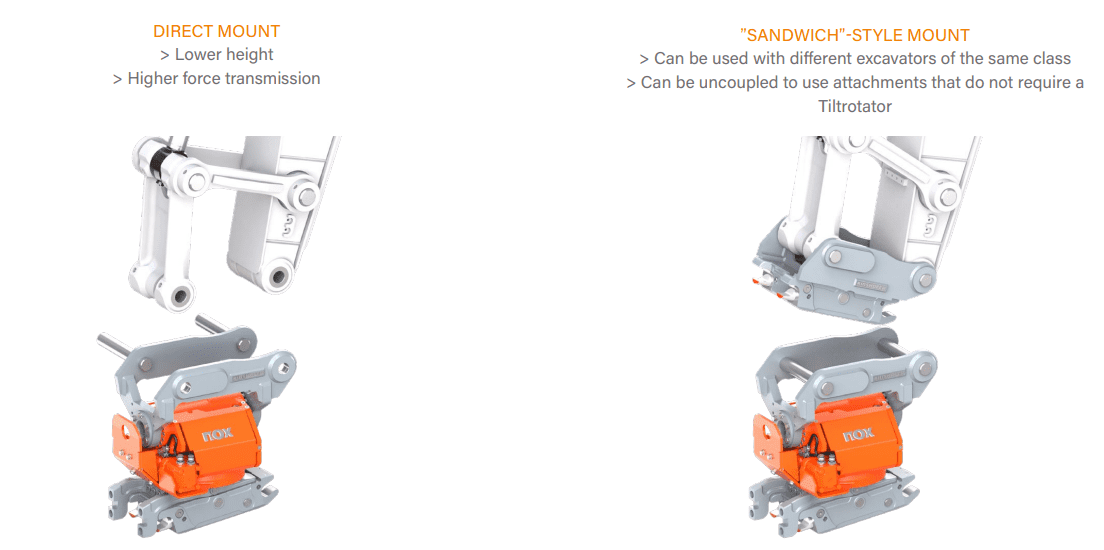
There are two common ways of mounting a tiltrotator to an excavator. You can directly mount the unit through the machine dipper/stick, which we refer to as a “direct mount” setup. See pictured below:
A direct mount setup reduces the overall loss of breakout force, as it keeps the added height to a minimum. Breakout force is the amount of digging power that the machine has when curling the bucket. Any added height by an attachment on the end of the machine dipper incurs a loss of breakout force, therefore directly mounting the tiltrotator means the tiltrotator can use its maximum force.
The second way to mount a TR is by picking it up with a quick coupler. This requires a fixed pin setup on the upper bracket of the tiltrotator that can be picked up by a hydraulic or mechanical coupler. This adds height to the overall attachment configuration but has the main advantage of being able to easily drop the tiltrotator for jobs where it is not needed. This is referred to as a “sandwich” or “top hitch” setup.
Something that we will get into in the next section is the type of lower couplers that are available underneath a tiltrotator. Of course, the standard setup is to have the same style coupler on top of the TR as is underneath. This means that you can pick up the same buckets with the NOX as you can without the NOX attached. If you ever have any issues with the unit, you can revert back to a standard coupler and bucket combination. Or if you have a job that requires a lot of breakout force or is hard digging, you can simply drop the TR and use a standard bucket.
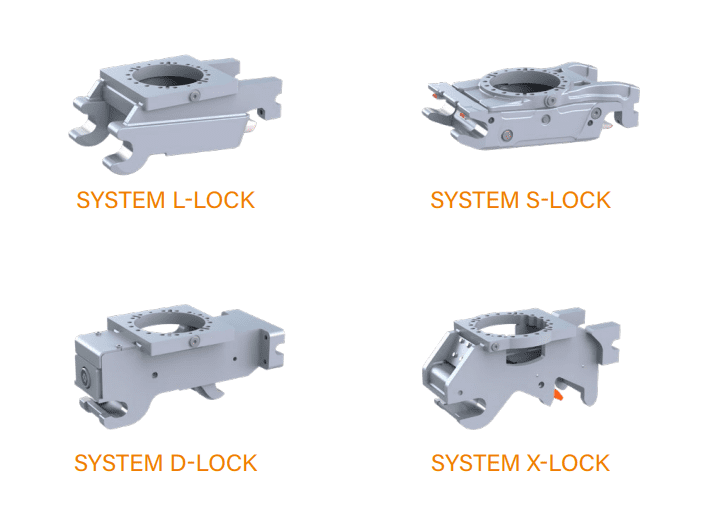
The common standard coupler type used for tiltrotators is called an S Lock or S Type, which originates from Scandinavia. These countries have been at the forefront of tiltrotator technology for many years and many manufacturers are based in Sweden. This style of coupler keeps the build height low, which is vital in a TR setup. For the NOX, we don’t recommend a sandwich setup, unless you are using a S lock coupler, as the overall build height becomes too large.
Lower Coupler Types
This brings us to the lower coupler that is at the bottom of the unit, and is used to pick up all of the attachments and work tools.
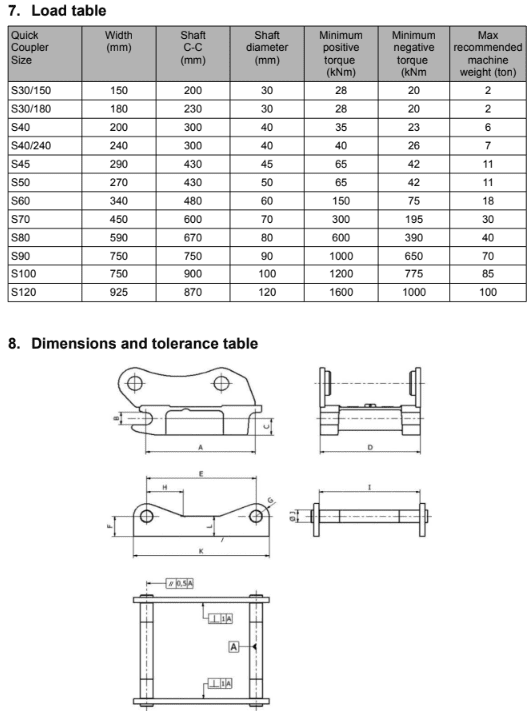
As we mentioned above, the standard configuration in the tiltrotator market, is the S type. The S type has standardized pin dimensions that are able to be picked up by the coupler. As you can see below that the S Lock has the lowest overall height, meaning you keep the most breakout force.
This means that everyone that uses an S40 coupler for example, can pick up any S40 attachment. Unlike a pin grabber style coupler that will pick up a range of pin dimensions, the S Lock will only pick up S Lock dimensions. See a list of the dimensions below.
We strongly recommend using the S Lock setup as it is designed specifically for tiltrotators and we believe it is the best combination. However, this does mean that you will either need a new set of S Lock buckets, or you can adapt your existing buckets to the S type pin dimensions. Of course, this is an added cost, but we strongly believe that it is worth it.
However, there are many different options available to suit different markets, industries and countries.
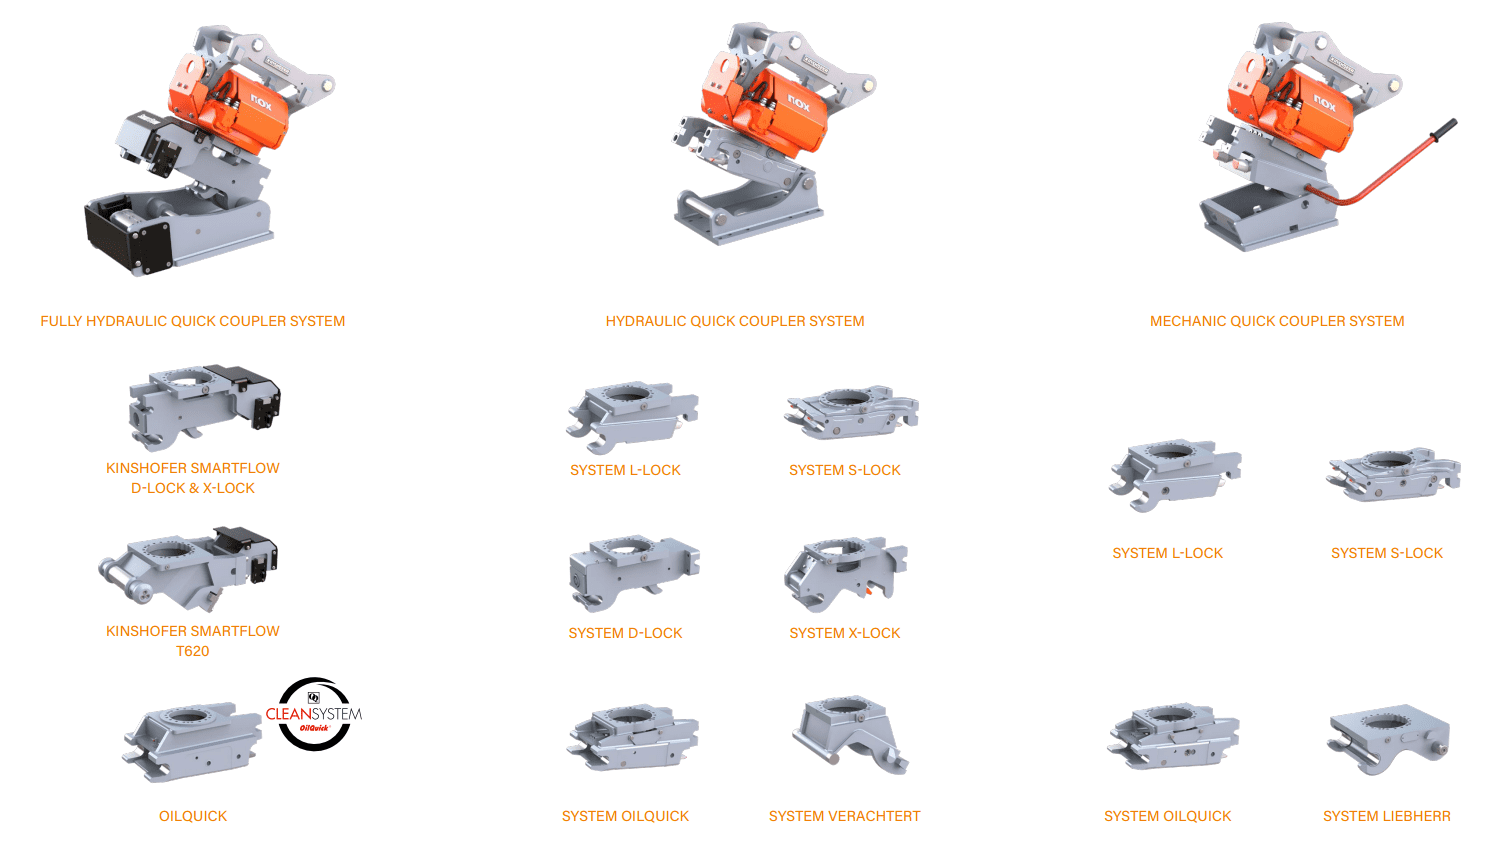
If you are determined to be able to use your existing buckets, there are “pin grabber” style couplers available to work in conjunction with a tiltrotator. However, this will greatly add to the height of the unit. Also, standard digging buckets are not designed to work with tiltrotators and can often be heavy and lead to a loss in performance. Later in the article, we will cover the attachments and tools that can be used with tiltrotators and why there are specific buckets designed for these setups.
Control Systems & Installations
Control Systems
Perhaps the most complex part of each tiltrotator attachment is the control system that is used to control the unit. What makes this harder to understand is the amount of different options that are available for the same unit. When you combine this with the coupler options and mounting options, there can be more than 20 configurations of the same tiltrotator model.
To try and simplify the options, we can split the control systems into two different categories and from there we will explain the two most common setups, at least for NOX systems.
Let’s break down each tiltrotator function:
- Tilt
- Rotation
- Open/Close Coupler
- Extra Function 1 (to operate hydraulic attachments like grabs etc.)
- Extra Function 2 (for smaller hydraulic attachments like grippers)
Now imagine that each of these functions require a two way hydraulic circuit to operate it. The circuit would have to be a two way circuit to run the function in both directions. Each circuit would also have to be a “proportional” circuit. This just means that we can control the oil flow through a roller switch on the machine’s joystick, and not a button or a pedal.
DF10
The simplest way to operate the tiltrotator then, would be to have a hydraulic circuit for each function on the machine – this would be called a “Direct Feed” system. Each hydraulic circuit on the machine directly feeds the function on the tiltrotator.
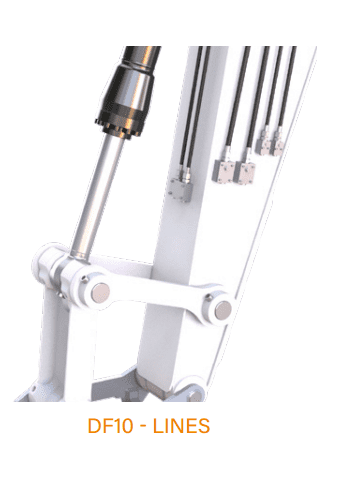
Above picture is what we refer to as a DF10 system on the NOX tiltrotator. 10 refers to the number of hoses required, 2 for each circuit and 5 circuits total.
Now, we understand that there are not many machines out there that would be equipped well enough from the factory to be able to directly feed each NOX function. Most excavators come from the factory with 1 or 2 auxiliary hydraulic circuits to operate attachments. This is where the electronic control systems come into play.
For each function that is lacking on the excavator side, we must make up for it with the NOX control system. You can think of it this way – the less equipped the machine, the smarter the control system has to be on the tiltrotator has to be – therefore the more expensive too.
NOX Prop+
On the opposite side of the range from a DF10 system would be the NOX Prop + control system. This is the smartest control system available with the NOX tiltrotator that is able to operate with only one single-directional hydraulic circuit. The NOX Prop + system uses electrical solenoids to turn a single hydraulic circuit into 5 functions and is operated by a fully independent control system that is installed onto the excavator.
This control option includes a 7” touchscreen monitor that is mounted in the cab of the machine and is used to control every aspect of the tiltrotator. All functions are interchangeable and can be adjusted to suit the operator.
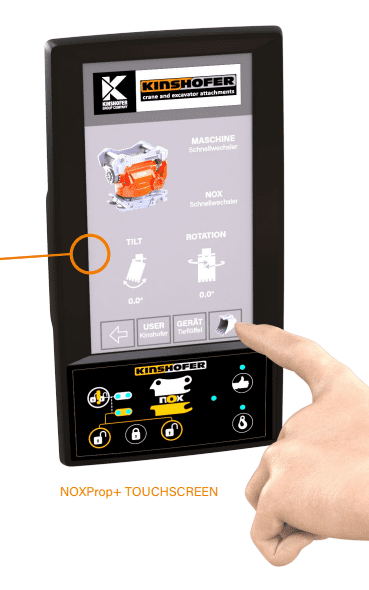
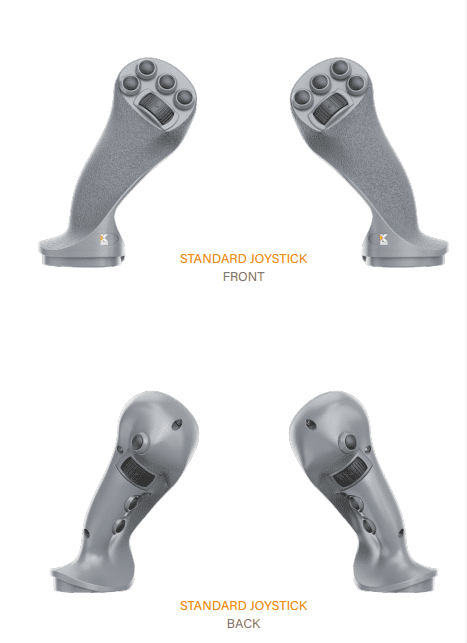
NOX Prop + also includes new joysticks that are installed on the machine to make use of the added functionality. The standard configuration for each joystick would be 2 rollers and 7 buttons on each. This allows full control of the tiltrotator functions, as well as the existing machine functions like the horn, accel/decel of revs etc.
Because of this new technology in the control system, there is an added cost compared with any of the direct feed systems. However, this does come with a great increase of functionality and features that can prove to be worth the extra cost. Also for machines with only 1 auxiliary circuit, like the US market, this is often the best option.
DF04
However, there is a good option in between the DF10 setup and the NOX Prop + control. This is referred to as a DF04 for the NOX. (These names will be different for each manufacturer).
A DF04 uses the same direct feed principle we discussed before, using two hydraulic circuits from the machine. These two circuits will directly feed the tilt and rotation functions. We include a much simpler control system that allows you to switch between the tilt function and either the coupler open/close, extra 1 or extra 2.
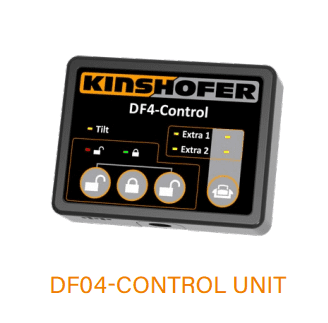
This offers a more cost effective solution than the NOX Prop + system for machines that come with 2 hydraulic circuits, like is standard on a lot of European machines. However, this system does have drawbacks, for example you are limited to only 2 functions at one time. This might mean if you are using a hydraulic attachment like a grab, that it may be slightly awkward to operate.
Installation
NOX Prop +
Installation of the NOX Prop + control system is a lengthy process that usually takes around 2 full days. This includes the hydraulic connections, boom cable, new joystick wiring, monitor wiring and mounting etc.
DF04
The DF04 system is a much simpler installation and can be carried out in a single day. The control box is similar to a standard hydraulic coupler control box. After running the boom cable from the NOX back into the cab, the box just needs to be connected to power. Like mentioned earlier, this box only switches one function to another.
DF10
A DF10 installation would only require connection of all 10 hydraulic hoses for each circuit. Machine hydraulic flows and pressures may need to be adjusted to suit the NOX specifications. Although this is true for all control systems.
Attachment & Tools
Tiltrotators are only as effective as the attachments and the work tools that work in combination with them. Each tiltrotator usually comes with at least a set of buckets. At The Attachment Company we offer a 3 bucket kit as standard.
Our tiltrotator bucket kits comprise of a narrow/cable bucket, digging bucket and grading bucket. Tiltrotator grading buckets are usually tapered to help with shaping edges, etc.

I liked all the information you provided. Thanks
Very Professionnal.I want to know more about your Factory and products