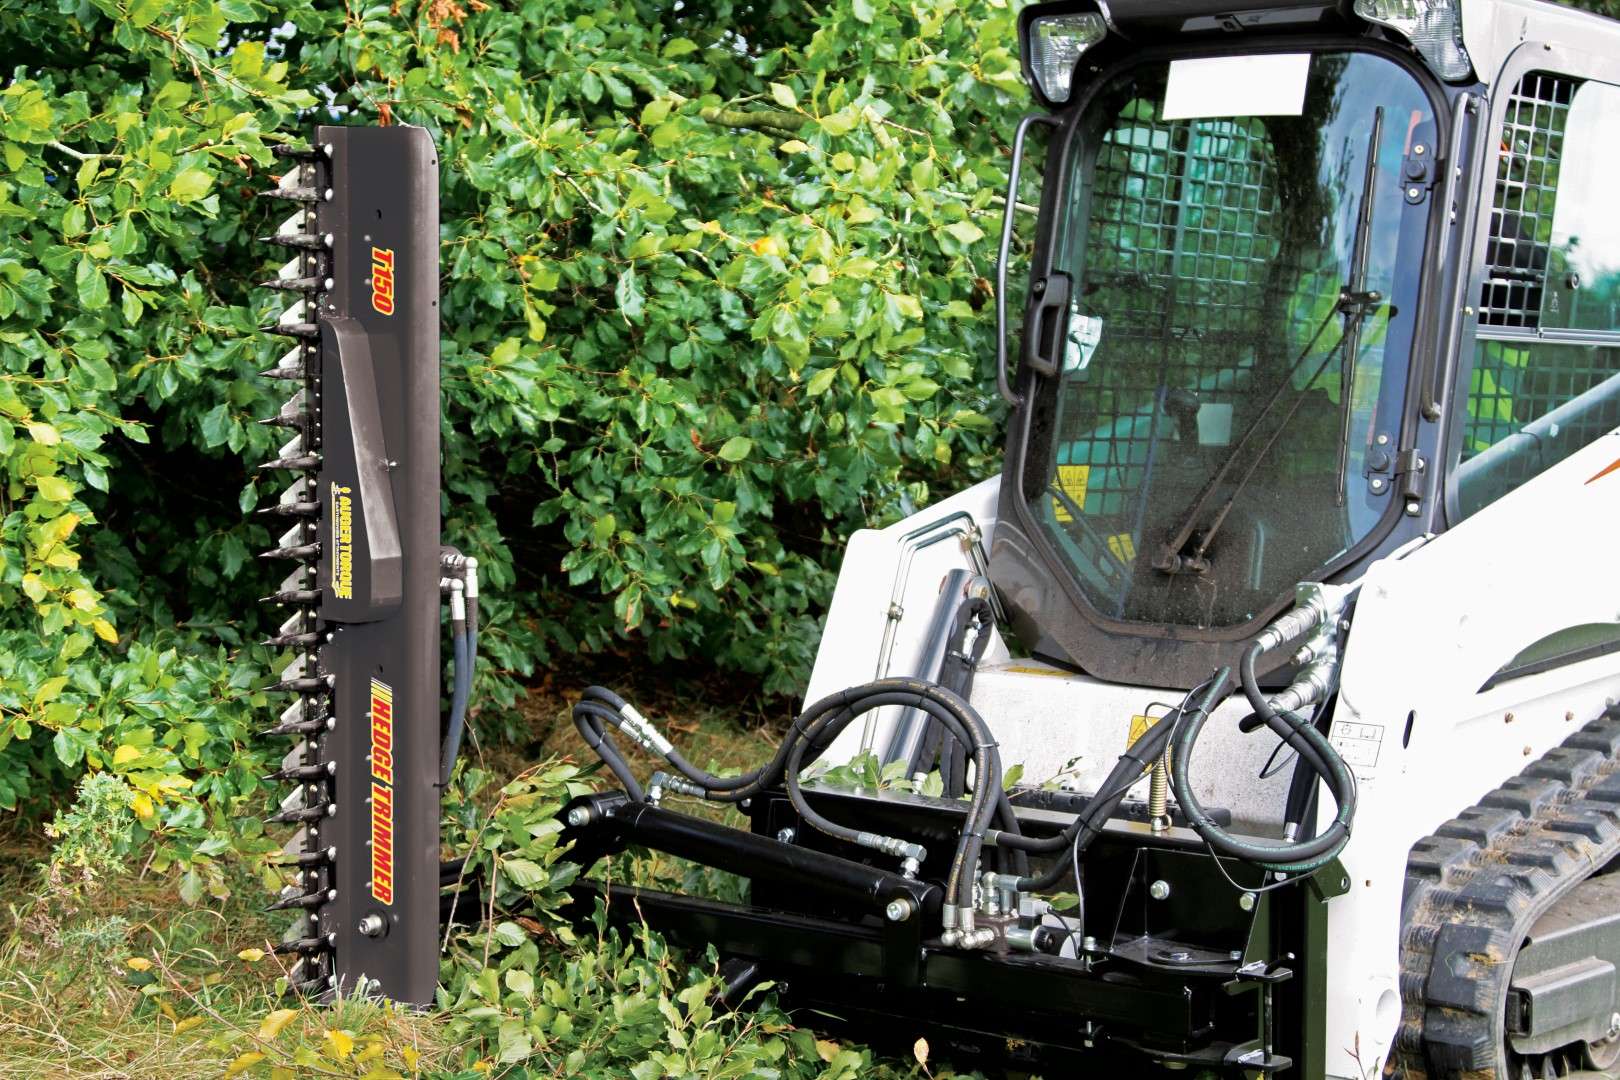
NEW PRODUCT – Skid Steer Sickle Bar Mower from Auger Torque
For the last few years we have been offering the hedge trimmer from Auger Torque as part of our attachment range for excavators. We are happy to bring to you our new Skid Steer Mounting System for the Auger Torque T150 Hedge Trimmer / Sickle Bar. We have seen an ever growing popularity for our excavator setup and believe that our new skid steer setup fills a large gap in our product range! Affordably turn your skid steer into a landscaping and trimming machine to trim bushes, hedges, long grass and brush. Contents Overview Specifications Hydraulic Angle Mounting System Control System Overview Sickle Bar attachments have been around for a long time, but now are more effective and flexible than ever. Using the hydraulic capabilities of excavators and skid steers, these type of attachments give another use to these machines than just moving dirt. Feedback from our customers indicate that they can increase their workload and take on new jobs with the right attachments on hand. The sickle bar mower attachments for both skid steers and excavators allow for fast, neat and effective trimming of vegetation and bushes. Applications Roadside hedges/bushes Ditch cleaning and maintenance Tree trimming and thinning Golf course maintenance Residential lawn maintenance Brush & long grass trimming Specifications Although we offer one standard length bar, there are other changeable features to our hedge trimmer attachment that allow it to suit a range of mini excavators and skid steers. However, focusing on skid steers for the purpose of this article, we offer the following specifications: Trimmer Bar Motor Size: 100cc Oil Pressure Range: 2176-3191 psi Oil Flow Range: 13.2-18.8 gpm Max. Cutting Diameter: 1.58” Standard Cutting Length: 5ft (60”) Optional Extension Bar: Extra 40” – Total of 8ft Dimensions (h x w x l): 7.99” x 10.61” x 60.5” Weight: 152lbs Extension Bar Cutting Length: 40” (Combined Cutting Length: 100“) Max. Cutting Diameter: 1.58” Dimensions (h x w x l): 4.65” x 8.86” x 46.93“ Weight: 57.3 lbs Hydraulic Angle Mounting System After having great success with the simpler excavator mounted hedge trimmer attachment, it is the perfect time to launch the new skid steer mounting system. Mounting this style of trimming attachment to a skid steer loader does have benefits, however it does not offer the flexibility of the excavator without an innovative mounting system. Step in the hydraulically adjustable angle mount for skid steer loaders. Using a heavy duty hydraulic cylinder and an electric solenoid configuration, the trimmer can sit outside the width of the skid steer and the cutting angle can be easily changed without leaving the machine. The mounting configuration can also be adjusted to sit on either side of the machine. Control System Each attachment is supplied with a standalone control box that allows us to bypass the specific electrical differences between the skid steer manufacturers. A control box is mounted in the cab that only needs to be connected to a 12V power supply. This box operates the solenoid valve on the mounting frame to switch between operating the bar and changing the angle. As with all products offered by The Attachment Company, we stand behind the build quality and robustness of each attachment but also carry spare parts to get you back up and running as soon as possible. For the hedge trimmer attachment, specifically, we offer the standard Auger Torque warranty of 3 years on the hydraulic motor and a 2 year warranty on all other components. If you have any issues beyond that time frame we are always open to working with you to get the problem resolved in a cost friendly manner. If the attachment doesn’t meet your expectations when it arrives, we will return the product and provide you with a full refund. If you have any questions regarding this attachment or anything else offered in our product range, you can contact us on (941) 212-0037 or [email protected]. Skid Steer Sickle Mower / Sickle Bar from Auger Torque listing! Thank you for reading! The Attachment Company LLC Add to cart Hedge Trimmer Extension Bar – 40″ Long Rated 0 out of 5 $1,095.00 Select options Skid Steer Sickle Bar Mower – Auger Torque T150 Rated 0 out of 5 $7,685.00 – $8,650.00
Complete Guide to Excavator Thumbs
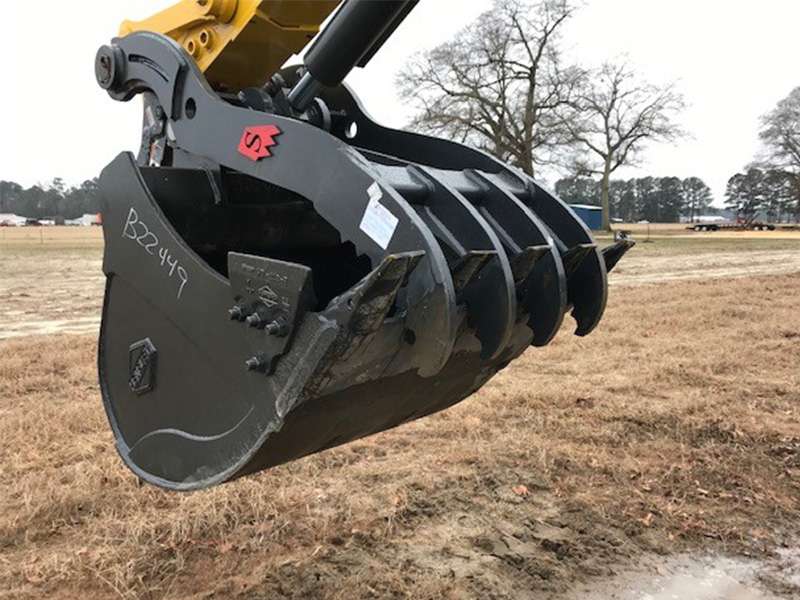
Thumbs are one of the most popular attachments for excavators in the US market. Many machines now come straight from the factory with base plates for thumbs already on the machine, or some with a full thumbs setup installed. A thumb attachment on your excavator turns your machine into a grapple/material handler instead of just a digging tool. The concept is simple and often more affordable than a dedicated grab or grapple attachment. Contents What is an Excavator Thumb? How Does a Thumb Work? Applications Different Thumb Designs Thumb Installation Other Attachment Options The Attachment Company Thumbs Conclusion What is an Excavator Thumb? In principle, an excavator thumb attachment is another lever that can be used in combination with the excavator’s bucket in order to pick up material like branches, brush, rocks etc. Working with a standard digging bucket leaves you slightly limited when it comes to being able to easily pick up and move objects or stacks of objects on the jobsite. What makes a thumb valuable is its simple design and concept, affordability and ease of use. When stored in the upright position it is completely out of the way and doesn’t stop the operator from digging as usual. How Does a Thumb Work? The most common thumb setup is a hydraulic thumb, or to be more specific a main pin hydraulic thumb, which is probably the most popular setup overall. We will cover all of the other thumb variations that are available later in this article. For now we will focus on a typical hydraulic thumb setup and how it works. As mentioned above, a thumb is another lever that lets you pick up material when used with the bucket. Above is a main pin hydraulic thumb. You can see that the pivot point of the thumb is through the main bucket pin that goes through the excavator’s stick. This is the most common setup as it requires the least amount of installation because you are utilizing the main pin as the pivot. However, this is not the only way of setting up a thumb. This main pin hydraulic thumb uses a hydraulic cylinder that is supplied with the thumb to open and close the thumb. The cylinder pins onto the thumb and also to a base plate that is welded on the stick of the machine. This allows the operator to work in different positions depending on how stretched out, or close to the machine they are working. Again, this is not the only way of operating a thumb as the traditional thumbs were what are referred to as manual thumbs, that are fixed in position. Only using the rotational of the bucket to hold against the thumb. However, this offers very little flexibility. At The Attachment Company we have since stopped offering manual thumbs as we believe that the price difference between a manual and hydraulic thumb is worth every penny, and strongly advise the hydraulic option. Applications What makes thumbs so popular is the range of applications that they can be used for and not being a dedicated attachment for one job. When not in use, the thumb can easily be stored out of the way, in the upright position. Common thumb applications: General land clearing: moving brush, trees, logs etc. Demolition – moving concrete waste etc. Stump removal: works well when used in combination with our stump puller Different Thumb Designs Earlier we covered the old style manual thumbs and the most popular main pin thumbs. However, let’s cover the other popular setups before going any further. Hydraulic Quick Coupler Thumb A hydraulic quick coupler thumb (or coupler thumb) works the same as a main pin setup, still mounting through the stick of the machine, but through the coupler, instead of the bucket. This means that you can change between buckets easily, and the thumb stays on the machine. Something to bear in mind when ordering a standard main pin thumb, is the extra work that will be needed to change between buckets. The main difference between a coupler thumb and a standard thumb is the length. To account for the extra height of the quick coupler, the thumb must be longer in order to properly mesh with the bucket’s cutting edge. Hydraulic Stick Mounted Thumb Another popular thumb design is a hydraulic stick mounted thumb. This style is completely independent of any coupler’s or bucket’s by being mounted completely on the excavator. Stick mounted thumbs require more welding when being installed as there has to be two pivot points welded to the machine. Most stick mounted thumbs that we supply come with a large single piece base plate that is welded to the stick. See below. Progressive Link Thumb Perhaps the latest thumb design is the progressive link thumb. This setup uses an extra link in between the hydraulic cylinder and the thumb in order to achieve more rotation. Being able to rotate the thumb further, means that you can work closer to the cab with the stick more upright and still meet the bucket’s cutting edge. In most cases the link is cut out of very thick metal plates to withstand the loads that can be put upon the thumb. Some manufacturers even use a cast link to achieve the strength needed. How To Install A Hydraulic Thumb On An Excavator? Since there are a few different thumb designs, they are all installed slightly differently, however the principle is going to be the same across the board. We recommend having your thumb installed by an experienced excavator dealer/mechanic. In the US, most machines now come with a hydraulic thumb from the factory. If not, they often have a cylinder base plate already mounted on the excavator so there will be no need to weld the base plate yourself. However, when ordering a thumb from any manufacturer, make them aware if your machine already has a thumb base plate installed, as they will have to provide a thumb cylinder that matches
NEW PRODUCT – Digga XD High Flow Trenchers
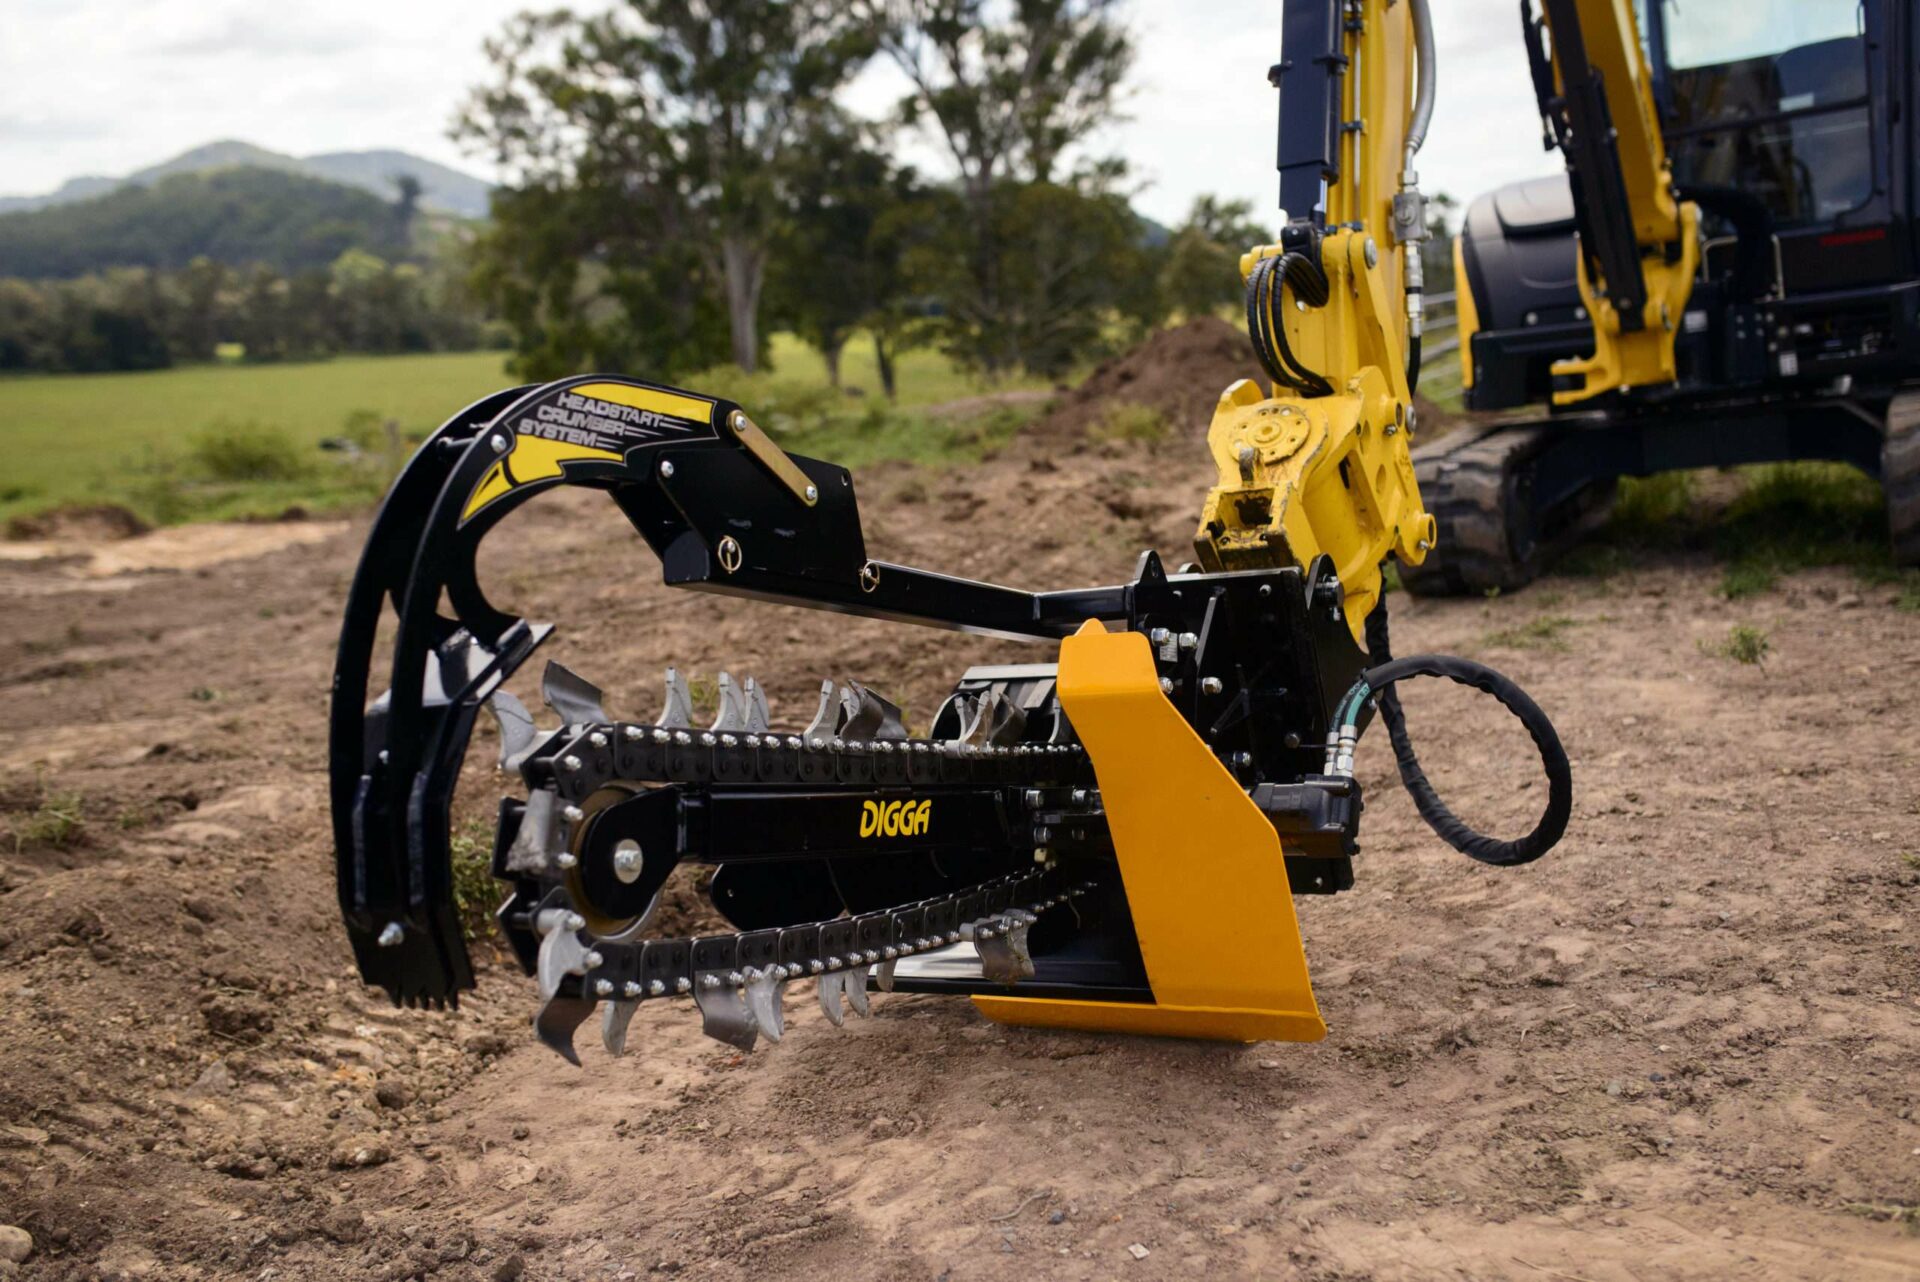
We are proud to launch some of the toughest and heaviest trenchers on the market from Digga. Based in Australia, Digga manufactures augers, trenchers and more for shipping all over the world. Tough, reliable and heavy duty – their XD trencher line can trench up to 5 feet deep and 12” wide. The Attachment Company now offers the Digga XD High Flow Trencher models for depths of 4 and 5 feet with chains from 6 inches wide to 12 inches wide. Skid steer mounts and custom built excavator mounts are available to suit high flow skid steer loaders as well as excavators up to 10 tons. Why use a trencher? Trenchers can dramatically improve the efficiency of digging a trench versus digging with an excavator. Not only will your trench be more consistent, it will also be completed much, much faster. Trench quickly and accurately Maintain consistent depth throughout the whole trench Dig as narrow as 4” and as wide as 12” Dig narrow trenches at deeper depths that with a bucket “Crumber” bar enables clean cut sides of the trench Spoil auger displaces the soil neatly to one side for easier backfilling Applications Trenchers can be used in many different applications .Some of the most popular application are listed below: Pipe laying for irrigation, Underground power and communications Underground communications: telephone lines, internet etc. Road repairs General construction Trenchers from Digga have a few unique features that make trenching a simpler and more efficient task. Adjustable Depth Control One of the greatest features of each Digga trencher is the ability to adjust trenching depth quickly and accurately. Using the adjustable skid plate on the side of the unit – you can set the working depth of the trencher. When the skid plate is sitting flush on the ground – you know that you are getting the correct depth that is needed. XD 1200 HF (4ft) Depth Presets 24”, 32”, 40” & 48” depths XD 1500 HF (5ft) Depth Presets 30”, 40”, 48” & 60” depths Head Start Crumber System With the head start crumber system, you can start trenching from within the cab without having to get out and put down the “scraper” bar that cleans out the trench. The “crumber” is important because it scrapes all the dirt from the bottom and sides of the trench to force it up the chain to the auger. This means you get a clean trench on the bottom and the sides. Choosing the Correct Trencher Attachment As with any skid steer or trencher attachment – choosing the correct tool for your machine and application is vital to ensure that you get the most from your investment. Skid Steers & Excavators We use the same trencher attachments for skid steers and excavators. The only change is the mounting system to suit the machine that the trencher will be going on. XD High Flow Trenchers suit larger skid steers with high flow capabilities up to 45GPM. These units also suit excavators in the 5 to 10 ton range. Once the parent machine has been established to be within the operating ranges of the XD High Flow trencher models – we can select a depth and chain width. Both XD High Flow Models can trench from 6 to 12” wide at their maximum depths. Chain Types For these models – we highly recommend the combination chain that has a combination of tungsten and earth teeth for a mixture of different terrains. Equipment Maintenance Digga trenchers should be maintained like all other pieces of heavy equipment with oil changes at the prescribed intervals as well as regular all around checks on the unit. Chains can be tensioned to the correct tension when becoming loose. Wear parts like teeth and sprockets can be replaced when worn out to help with keeping efficiency high when digging. The Attachment Company carries spare parts for all of our attachments to get you back up and running as quickly as possible. Warranty Should you ever have any issues – Digga products are covered under an industry leading warranty listed below: 36 months gearbox warranty 24 months hydraulic motor warranty 24 months on all other parts excluding wear parts e.g. teeth Outwith these warranty periods, The Attachment Company, are pleased to offer replacement parts at reasonable prices. We are proud to work hard to service our customers, as we realize there are many options available when choosing excavator or skid steer attachments. We believe that service and support is second only to quality, when it comes to the importance of choosing an attachment! If you have any other questions that are not covered in this article, please do not hesitate to contact us through our website or call (941) 212 0037. https://youtu.be/FBebSw0f9Pc
Complete Guide to the NOX Tiltrotator
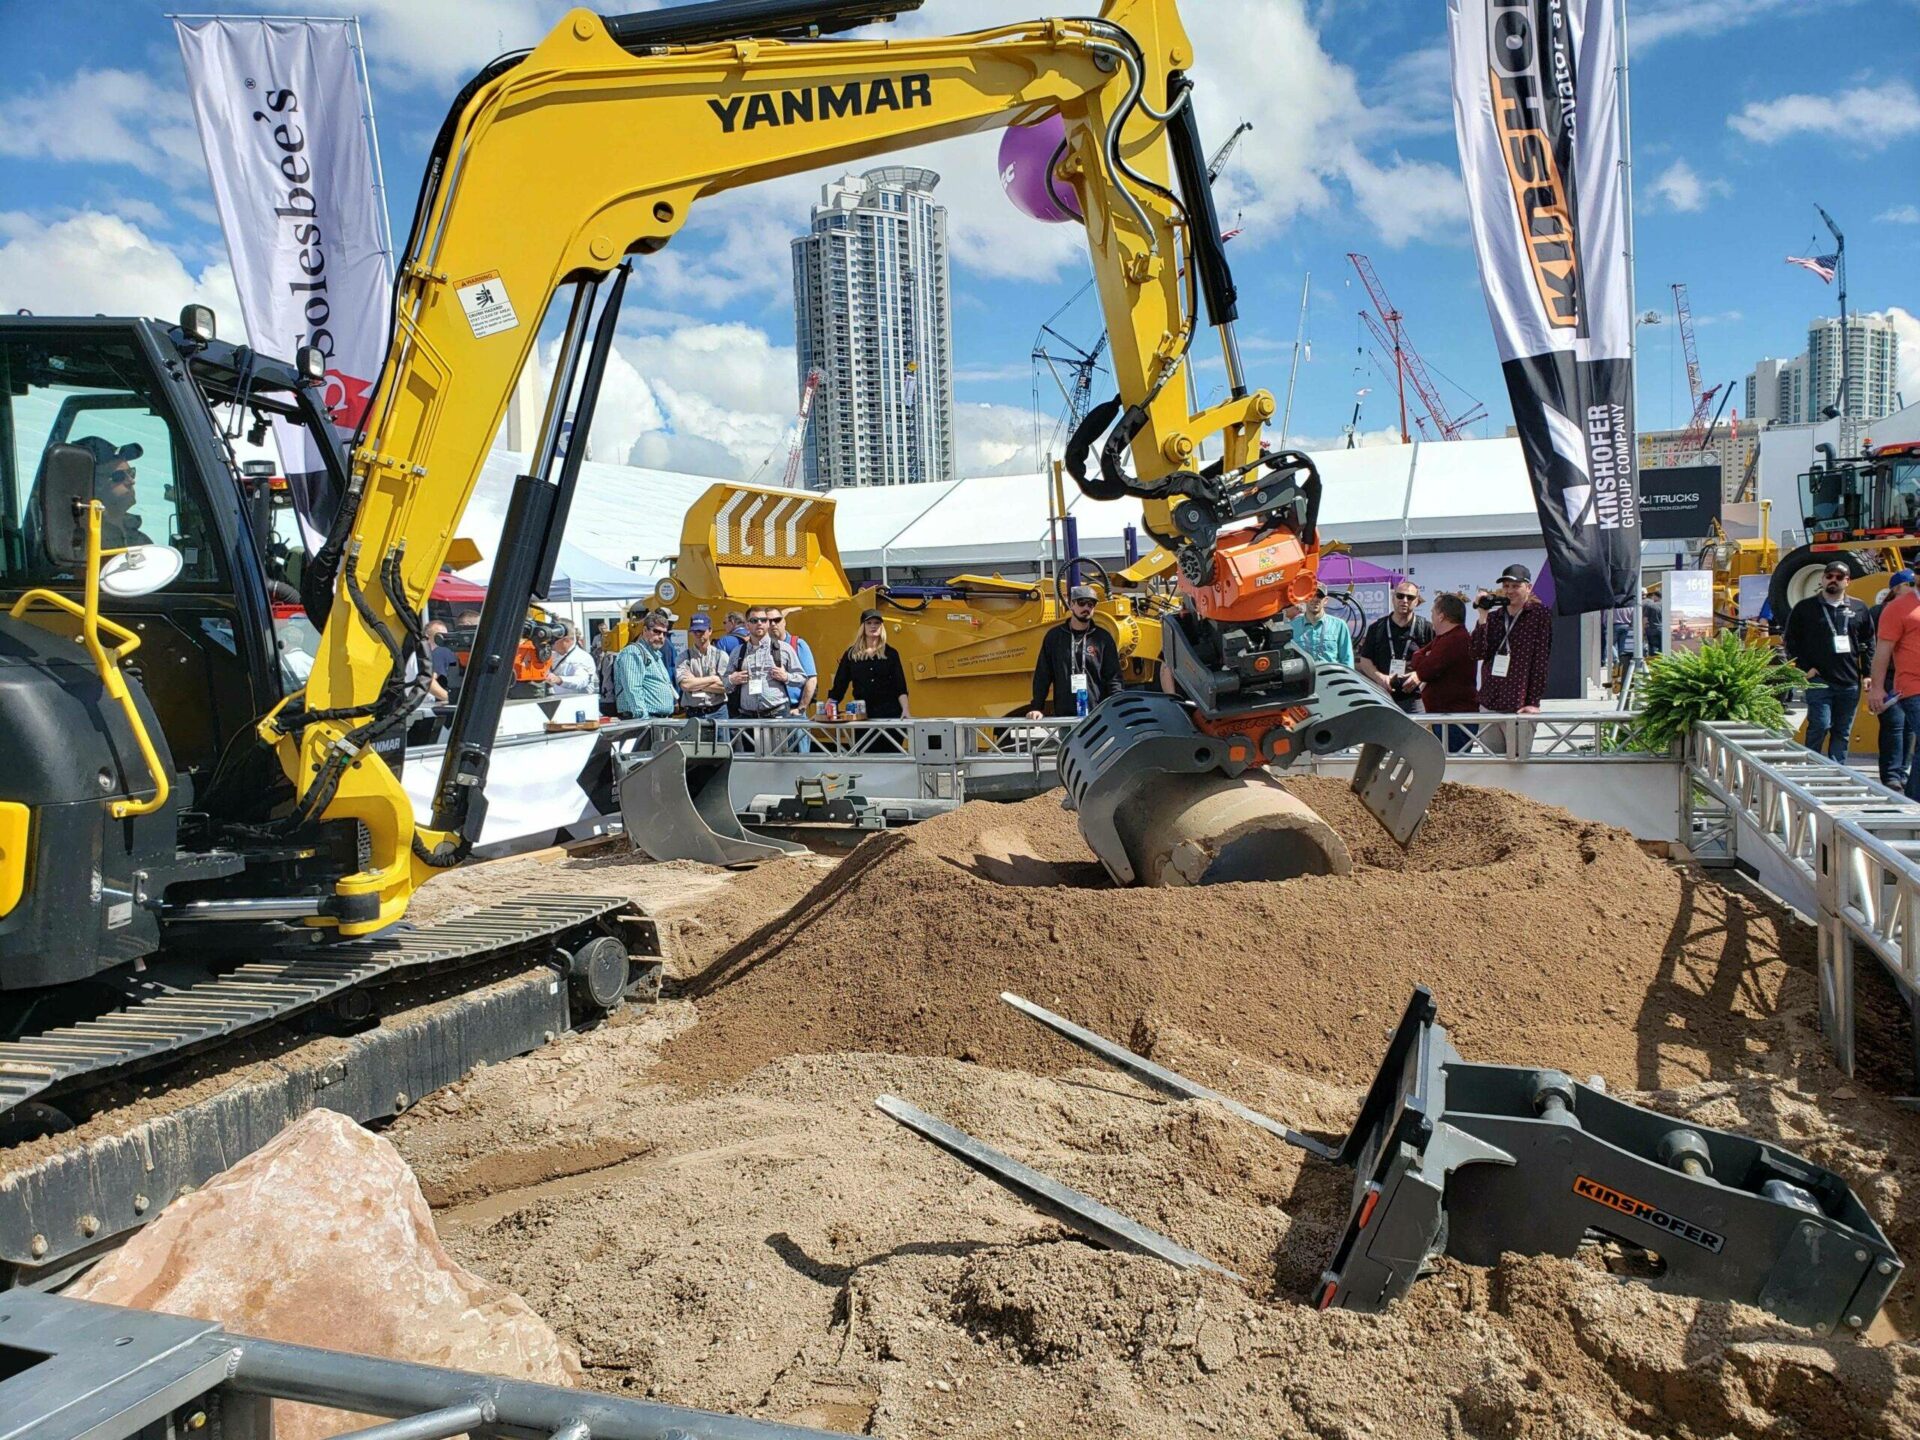
Tiltrotators are one of the most advanced and complex attachments in the world for excavators. They allow for endless 360 degree rotation of the attachment as well as up to 50 degrees of tilting angle each side. Tiltrotators are a lot more advanced than most attachments on the market and therefore have many different setup configurations, like mounting options, control systems, quick coupler options & more! Our aim with this article is to provide you with a complete guide to tiltrotator attachments, not just the NOX tiltrotator that we offer from Kinshofer. The NOX does have some unique features however, most tiltrotator concepts are very similar across all manufacturers. Contents Overview & Applications NOX Specifications Machine Side Mounting Options Lower Coupler Options Control Systems & Installations Attachments & Tools 3D Grading Systems Overview & Applications As mentioned earlier tiltrotators offer the greatest flexibility and efficiency for your excavator by allowing a degree of movements that are not possible with a standard setup. Increased range of motions allows you to operate in places that were before inaccessible with your machine or required a lot of repositioning. However it is not only digging, grading and earth moving that a tiltrotator is useful for. With a range of attachments specifically designed for use with tiltrotators such as compactor plates, grabs, brushes/brooms, grippers and pallet forks, the tiltrotator turns your machine into a multi functional tool carrier. It is estimated, by most manufacturers, that a tiltrotator can increase the operator’s efficiency by more than 30% and can prove a return on investment in just a few years. This is achievable by completing jobs faster, with less ground workers, burning less diesel and less wear on the excavator. A competent tiltrotator operator requires fewer workers on the ground as they can often complete tasks with the added functionality of the attachments at hand. In short, although they are a large investment, after looking at the numbers they can prove to be a certain smart investment. NOX Specifications The next section of this article is going to be more specific to the NOX tiltorator from Kinshofer, however there are still many similarities between the other brands of tiltrotators on the market. For example, the overall range of movements are very similar, the NOX just uses different mechanisms to achieve them. However, the main difference between the NOX tiltrotator and others, is the tilting mechanism so let’s start there. Tilting Mechanism Most tiltrotators on the market use 1 or 2 hydraulic cylinders to achieve the tilting motion. This has its advantages but does add to the overall width of the units. The NOX uses an elliptical piston and sleeve mechanism to achieve a greater range of tilting with 50 degrees each direction. This is the same mechanism that is used in many tilting couplers. Although this does increase the overall weight and height of the attachment, the idea is to achieve the most tilt possible, as well as keeping the width of the unit to a minimum. This also means that the tilting torque of the unit is constant regardless of the angle. Meaning you will get the same torque in the middle, as you do at 40 degrees on one side. All tiltrotators use a worm drive for endless 360 degrees of rotation. This enables good rotational torque, as well as being able to withstand high loads. In the case of the NOX, the worm drive is specifically designed to keep the overall width of the unit to a minimum. Machine Side Mounting Options There are two common ways of mounting a tiltrotator to an excavator. You can directly mount the unit through the machine dipper/stick, which we refer to as a “direct mount” setup. See pictured below: A direct mount setup reduces the overall loss of breakout force, as it keeps the added height to a minimum. Breakout force is the amount of digging power that the machine has when curling the bucket. Any added height by an attachment on the end of the machine dipper incurs a loss of breakout force, therefore directly mounting the tiltrotator means the tiltrotator can use its maximum force. The second way to mount a TR is by picking it up with a quick coupler. This requires a fixed pin setup on the upper bracket of the tiltrotator that can be picked up by a hydraulic or mechanical coupler. This adds height to the overall attachment configuration but has the main advantage of being able to easily drop the tiltrotator for jobs where it is not needed. This is referred to as a “sandwich” or “top hitch” setup. Something that we will get into in the next section is the type of lower couplers that are available underneath a tiltrotator. Of course, the standard setup is to have the same style coupler on top of the TR as is underneath. This means that you can pick up the same buckets with the NOX as you can without the NOX attached. If you ever have any issues with the unit, you can revert back to a standard coupler and bucket combination. Or if you have a job that requires a lot of breakout force or is hard digging, you can simply drop the TR and use a standard bucket. The common standard coupler type used for tiltrotators is called an S Lock or S Type, which originates from Scandinavia. These countries have been at the forefront of tiltrotator technology for many years and many manufacturers are based in Sweden. This style of coupler keeps the build height low, which is vital in a TR setup. For the NOX, we don’t recommend a sandwich setup, unless you are using a S lock coupler, as the overall build height becomes too large. Lower Coupler Types This brings us to the lower coupler that is at the bottom of the unit, and is used to pick up all of the attachments and work tools. As we mentioned above, the standard configuration in
Guide to Hydraulic Breaker Attachments
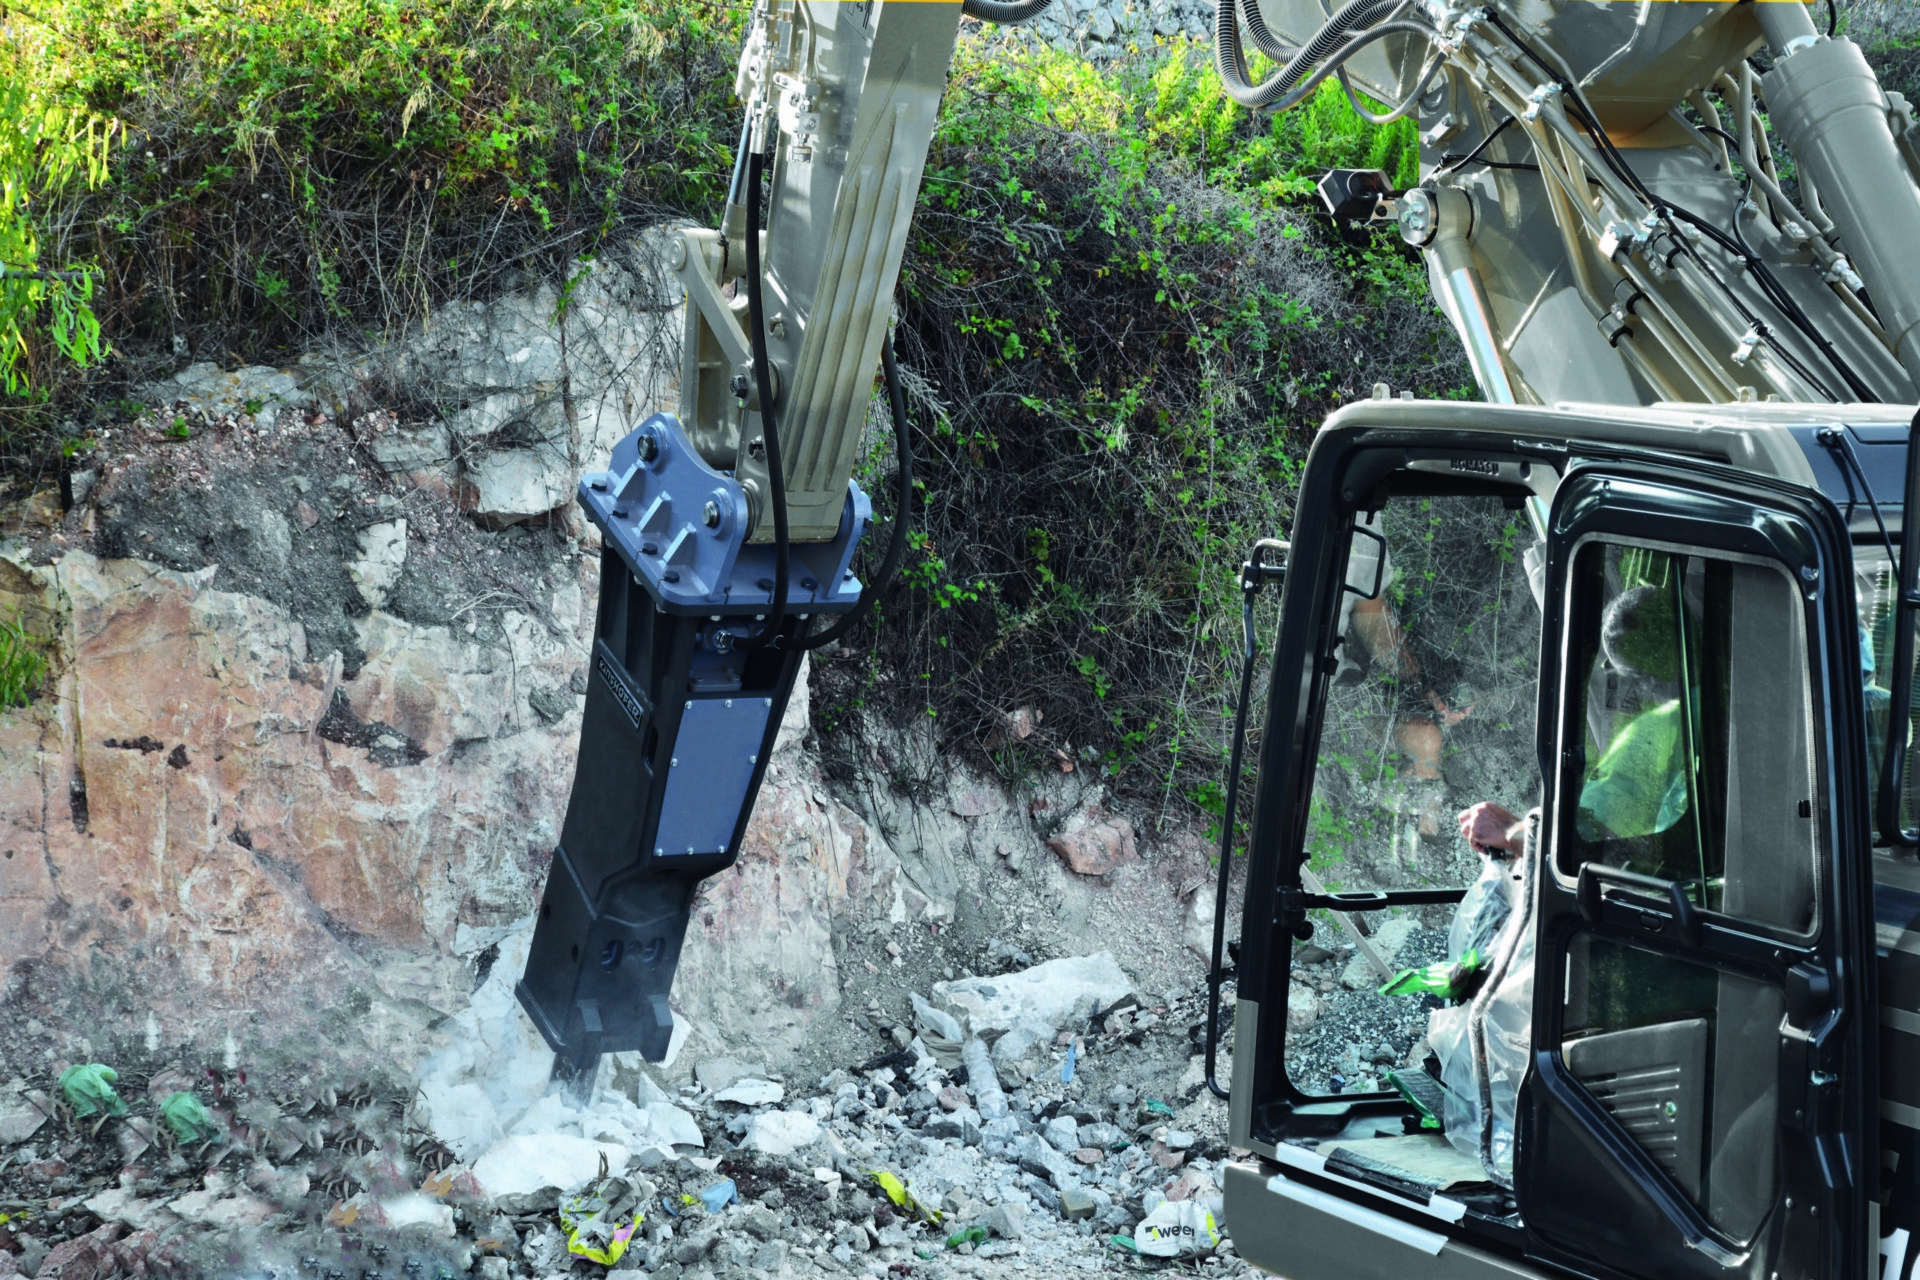
One of the more popular attachments in the construction industry is a hydraulic concrete breaker (often known as a breaker or hammer). These come in many different sizes to suit excavators, skid steers and mini skid steers. The purpose of a hydraulic breaker is to break up hard material like concrete, asphalt and rocks. Concrete breaker spec sheets can often be confusing and hard to read, and that is where we are going to break it down. The Attachment Company is providing a guide to hydraulic breaker attachments – how to select the correct breaker attachment to suit your machine and your application. The Attachment Company is providing a guide to hydraulic breaker attachments – how to select the correct breaker attachment to suit your machine and your application. If there is anything in this guide that you do not understand, you can refer back to our broad skid steer attachment guide here. Excavator Breakers Firstly let’s talk about breakers for excavators. The same breaker can be used on both skid steers and excavators; it is just the mounting system that changes. Excavator breaker mounts are built to suit your machine’s pin dimensions or quick coupler dimensions. Typically this is as follows: pin diameters, pin center to center and excavator stick/dipper width. Skid Steer Breakers Like mentioned above, the same breaker can also be used for a skid steer and excavator. Skid Steers can be slightly different to size correctly, as we tend to use the hydraulic outputs of the skid steer to choose attachments, rather than the weight. You can refer back to our skid steer attachment guide here. Skid steers use a universal quick attach system that is common to all makes and models, so you don’t have to worry about fitting to your specific machine. Breaker Specifications Listed on breaker specification sheets are everything from weight to blows per minute to energy per blow. Usually, breaker sizes are broken down into excavator weight (or carrier weight). This makes it much easier when trying to choose a breaker to suit your machine. In general, most excavators in a specific weight range have very similar specifications when it comes to hydraulic flow and pressure etc. Meaning it is generally safe to size the attachment based solely upon the weight of your machine. For example, as shown above, our SB250 breaker will suit excavators from 3 to 8 tons. You might notice that there is a lot of overlap between the weight ranges of each breaker. This is true and there are often 2 or 3 different sizes that would work on your machine, depending on the application, price etc. As shown on the spec sheet above, the SB250 breaker has an operating oil flow range of 7.9-15.8 GPM and an operating pressure of 2,030psi. Comparing these to the output of your machines hydraulics, will give you an idea if you need a larger or smaller unit, or if this model is suitable. Hydraulic Connection Concrete breaker attachments use a one-way hydraulic circuit – meaning 2 hoses with a pressure and a return line for the hydraulic oil. These can be operated on excavators with a single direction circuit, and don’t require two-way hydraulics like some other attachments, augers etc. Tool Types There are many different tools that can be used with your concrete breaker. All of our breakers come with two tools: a moil point and a chisel. These are the most common tools when breaking up hard material. However, other tools are available for wood, asphalt and even pile-driving. See below. Other Specifications There are some other breaker specifications that are important when choosing the correct attachment for your application. Most values tend to increase with the size of the breaker, except for the blows per minute, which tends to decrease slightly. Of course, oil supply, weight, energy per blow, chisel diameter and hose size, all increase on the larger attachments. Conclusion Using these steps above you can find out the correct breaker attachment for your machine or application. Excavators can use mostly use the machine weight, while skid steers can use the auxiliary oil flow and pressure (using a quick Google search for specifications). As always, if there is something that you can’t find an answer to, you can always talk to us here and we can assist you., or call (941) 212 0037. For more information on the GB Hydraulic Breaker range that we offer please take a look here. The Attachment Company LLC